
Sourdough Simplified: A Step-by-Step Guide for Baking Sourdough Bread at Home
Baking sourdough bread is like learning a new skill that’s both challenging and incredibly rewarding. It’s not just about throwing ingredients together—it’s a process, a little journey where each loaf teaches you something new. The cool part? Once you get the basics down, you’ll have the freedom to adjust the recipe to fit your kitchen, your taste preferences, and even try fun add-ins like nuts, seeds, or herbs to really make it your own.
So, why are people hooked on baking sourdough? Well, aside from the fact that nothing beats the smell of freshly baked bread filling your house, sourdough has some real perks. The fermentation process that makes it rise also makes it easier on your stomach, helps regulate blood sugar, and even brings some gut-healthy probiotics to the table. Plus, there’s a special kind of satisfaction that comes with making something so good from such simple ingredients.
In this guide, we’re here to walk you through the entire sourdough adventure. We’ll explain all the important terms, break down each step of the process (with a timeline to keep you on track), and share a few tips to help set you up for success from the start. We’ll also answer some common questions along the way because, let’s face it, baking sourdough can be a little mysterious at first!
Whether you’re brand new to sourdough or just looking to sharpen your skills, this guide has got you covered. Let’s get started—you’ll be turning out bakery-worthy loaves before you know it!

Start with a Starter
Before you can dive into baking your first sourdough loaf, you'll need one essential ingredient: a healthy, active sourdough starter. This bubbly mixture of flour and water is what gives sourdough its unique flavor and rise, and it’s the key to a successful bake. Think of your starter as the heart of your sourdough—it needs to be well-fed and thriving before you can put it to work. If you’re new to the process or just need a refresher, Click here to check out our complete guide on how to create a winning sourdough starter. It’ll walk you through everything you need to know, from feeding schedules, to maintenance, to troubleshooting!

Sourdough Speak: What All Those Terms Really Mean
The world of sourdough can feel a bit like learning a new language at first, with terms like "levain," "autolyse," and "bulk fermentation" popping up in recipes and social media posts. But don’t worry—we’ll walk you through all the key terminology and definitions right here, so you’ll have a solid understanding before diving in. Some of these terms describe more in-depth processes, which we’ll cover in detail a little later, but for now, let’s start with the basics to build your confidence!
LEVAIN is a portion of your sourdough starter, specifically the batch you prepare to use in your upcoming bake. It's made by mixing a bit of your active starter with fresh flour and water, and then letting it ferment. While some bakers use the term "levain," I don’t typically use it myself because it's essentially interchangeable with the term "starter." Both refer to the same thing: the fermented dough that gives your bread its rise, structure, and flavor. Levain is just the part of the starter that's ready for action when you're about to bake!
AUTOLYSE is a resting period where flour and water are mixed together and left to sit before adding other ingredients like the starter or salt. During this time, the flour absorbs the water, which helps develop gluten and enzymes, making the dough more elastic and easier to handle. It’s a simple step that can lead to better dough texture and improved flavor in your final loaf. Some bakers choose to add the sourdough starter at this point, while others wait until after the autolyse is complete. Both methods work, and it often comes down to personal preference or the specific recipe you're following.
BULK FERMENTATION is the first major rise of your dough after mixing the ingredients, where the yeast in the sourdough starter begins to work its magic. During this stage, the dough ferments as the yeast consumes the sugars in the flour, producing carbon dioxide, which causes the dough to rise. This period is crucial for developing flavor, structure, and strength in your dough. The term “bulk fermentation” is often used synonymously with “first rise” or simply “rise,” because it’s when the dough grows significantly in size before being shaped or divided. The length of this phase depends on factors like temperature and dough hydration (how much water is in the recipe).
STRETCH AND FOLDS is a technique used during the bulk fermentation phase to gently develop gluten in the dough without aggressive kneading. Instead of kneading, you grab the edge of the dough, stretch it upward, and fold it over itself, rotating the bowl and repeating this process a few times. This helps build strength and structure in the dough while keeping it soft and elastic. Some bakers prefer an alternative method called the COIL FOLD, where you lift the dough from the middle, allowing it to fold under itself, forming gentle coils. Both methods serve the same purpose of strengthening the dough and evenly distributing gases for a better rise and texture—it's just a matter of which technique you find easier to work with!
COLD FERMENTATION is a technique where the dough is placed in the refrigerator for an extended period, typically 12 to 48 hours, to slow down the fermentation process. By fermenting the dough at a cooler temperature, the yeast activity slows down, allowing the flavors to develop more deeply over time. This method not only enhances the flavor of the bread, giving it a more complex, tangy profile, but it also makes the dough easier to handle when it's time to score and bake. Cold fermentation is used after bulk fermentation, before or after shaping depending on the recipe, and is synonymous with "final proof" or "final rise". It’s a great way to fit the sourdough process into your schedule and get even better flavor in your final loaf!
SHAPING in sourdough baking refers to the process of forming your dough into its final shape before the final rise, or proofing. After bulk fermentation, the dough is gently handled and molded into its desired form, whether that's a round boule, an oval batard, or even a specific loaf shape like a baguette. Shaping is important because it helps create surface tension on the dough, which gives structure to the loaf and encourages an even rise during baking. It also helps control how the dough spreads in the oven, leading to that beautiful open crumb and crust. Mastering shaping takes practice, but it’s a key step in producing a well-formed, artisan sourdough loaf.
SCORING in sourdough baking refers to the practice of making deliberate cuts or slashes on the surface of the dough just before baking. This is done with a sharp blade, often a tool called a lame. Scoring serves both an aesthetic and functional purpose: it allows the dough to expand in a controlled way during baking, preventing random cracks or blowouts. The cuts create space for steam to escape, which leads to better oven spring and helps form the beautiful crust patterns that sourdough is known for. Scoring is also an opportunity for creativity, as bakers often design intricate patterns on the surface of their loaves.
OPEN BAKING and BAKING IN A DUTCH OVEN are two popular methods for baking sourdough, each with its own advantages.
OPEN BAKING involves baking the sourdough loaf directly on a preheated baking stone or sheet in the oven without any covering. This method allows for more airflow around the loaf, which can create a different crust texture, often crispier and with a deeper color. However, it requires the baker to introduce steam into the oven (by placing a tray of water or spraying water) to help the dough rise properly and form a good crust. Without steam, the crust may harden too quickly, limiting oven spring.
BAKING IN A DUTCH OVEN, on the other hand, traps steam naturally from the dough as it bakes, creating an ideal environment for oven spring and giving the bread that signature crispy crust with a soft, airy interior. The Dutch oven mimics a steam-injected oven, keeping the moisture in and surrounding the loaf during the first part of the bake. After about 20-30 minutes, the lid is removed to allow the crust to fully crisp and brown.
Both methods can produce great results, but Dutch ovens tend to be the go-to choice for home bakers looking for reliable steam and an even bake.
Sourdough Bread Recipe: Artisan Boule
This is the exact sourdough recipe I use every week, and it's become a staple in my kitchen. While I now double the recipe to make two loaves at a time, I started out by making just one—and it’s perfect for beginners and seasoned bakers alike. What I love about this recipe is the simplicity of the process. The oven temperature and timing are spot-on for producing crusty, well-developed loaves every time, even if I occasionally mess up the bulk fermentation timing (because, let's be honest, life happens!). It’s forgiving, reliable, and consistently delivers delicious results.
INGREDIENTS
- 500 Grams unbleached All-Purpose Flour (you can use Bread flour too)
- 350 Grams Water
- 50-75 Grams Sourdough Starter
- 10 Grams Salt
RECOMMENDED EQUIPMENT
- Glass mixing bowl or straight-sided proofing container
- Digital food scale
- Dutch Oven
- Banneton Basket
- Stiff silicone spatula or bowl scraper
- Plastic wrap or bowl cover
- Silicone bread sling
- Reusable bread bags to keep your loaves fresh
INSTRUCTIONS
Feed Starter at a time so when you begin the process of mixing your dough, the sourdough starter is near its peak. Don't worry too much if you aren't quite at peak or you are just past peak - it'll be ok!
Combine sourdough starter and water into a large glass bowl. Do a quick stir to mix the water and starter. Then add the flour and salt, mixing thoroughly until a shaggy dough forms.
Cover your bowl with a damp tea towel or plastic wrap (I prefer plastic wrap or a lid) and allow to Autolyse (rest) for approximately 1 hour.

Form your dough: Gather the dough into a ball by working around the bowl, pulling the outer edges of the dough up and over itself towards the center. Repeat this motion until a smooth ball forms, typically requiring around 20-30 stretches. I find it easiest (and less messy) to use a stiff silicone spatula or bowl scraper for this part.

Re-cover and allow to rest for 30 minutes.
Stretch & Folds: Over the next few hours, it's essential to develop gluten structure in your dough through a technique called "stretching and folding." Aim for about 4-6 sets of stretches and folds. Allow approximately 30 minutes between each set. During each set, stretch the dough up and over itself 4-6 times. While exact timing isn't necessary, ensure you complete at least 4 sets over the course of 2 hours.
As you go through the series of stretch and folds you will notice the texture of your dough changes. It starts out sloppy and pretty moist. Then it begins to become more pliable and less sticky. Usually by the 4th or 5th set, the dough is softer and more pillowy - and can almost be stretched without leaving dough on your hand. You should experience change during this time frame - but it doesn't need to be Instagram perfect! I often still have a dough that's slightly sticky and leaves dough on my hand even during my last set.

Bulk Ferment: Otherwise known as “Proofing” or “Rising," this is when the dough grows due to the natural yeast in the Starter fermenting. The amount of time this process takes largely depends on the ambient temperature of the room your dough is in. Ideal temperature is around 75 degrees and would take approximately 6-8 hours. In a cold room (under 70 degrees) it could take upwards of 10-12 hours. In a very warm room the process may only take 3-4 hours.
Time frame is inclusive of all previous steps - as-in, once you have combined ingredients and allow your dough to autolyse, you are also in the Bulk Ferment stage.
You know it’s time to move to the next step when your dough has risen approximately 30%, has bubbles underneath the surface, has a pillowy top that may dome like a cupcake and even start to separate from the sides of your bowl. Generally speaking, the dough is no longer sticky to the touch, or at least way less sticky!
Please note: This is the part - bulk fermentation - that is the most difficult to master! Truthfully, you only become better at knowing when it's time to move onto the next step through experience. Messing this up IS NOT the end of the world. If you haven't let the dough rise long enough you will likely get a dense, but still edible, bread. And if you let it go too long, the dough may become hard to handle and shape, but it will still be edible. It's rare to mess this up so bad that your final product is in-edible.

Shape the Dough: Get your countertop ready by lightly dusting it with flour—some bakers like to use rice flour since it’s gluten-free, but Bread or All-Purpose flour works just as well. Gently move your dough from the bowl to the countertop, placing the smooth top face down and the sticky bottom face up. Stretch the edges of the dough outward to form a rectangle. Next, fold the shorter sides inward, like an envelope, though it will now look more like a log. Starting with the short end of the log, gently roll it inward on itself until it forms a rounded ball. These first shaping steps create quite a bit of surface tension - which is the whole point of shaping. Finally, rotate the dough ball with your hands or a bench scraper, tucking the dough underneath to build even more surface tension.
Place the shaped dough upside down in a banneton basket or a clean bowl. Then, pinch the bottom of the dough together to create a seam, and add just a bit more surface tension. There's no exact science here—simply pull opposite sides of the dough together and pinch them to seal. If your countertop was heavily floured, you might need to wet your fingers slightly to help the dough stick.


Cold Ferment: Loosely cover your bowl or basket with either plastic wrap or a damp tea towel, then refrigerate. Allow it to rest in the fridge for a minimum of 5 hours, up to a maximum of approximately 36 hours. Extended cold fermentation enhances the bread's flavor profile and texture, resulting in a crust with beautiful blisters and a richer sourdough taste. Additionally, the prolonged refrigeration period encourages the formation of a skin on the dough, facilitating easier scoring before baking.
Preheat your oven and Dutch Oven to 475° F. Typically, I put the dutch oven in when the oven is cold. I let the oven heat up to temperature, and then I continue to heat for 20 more minutes.
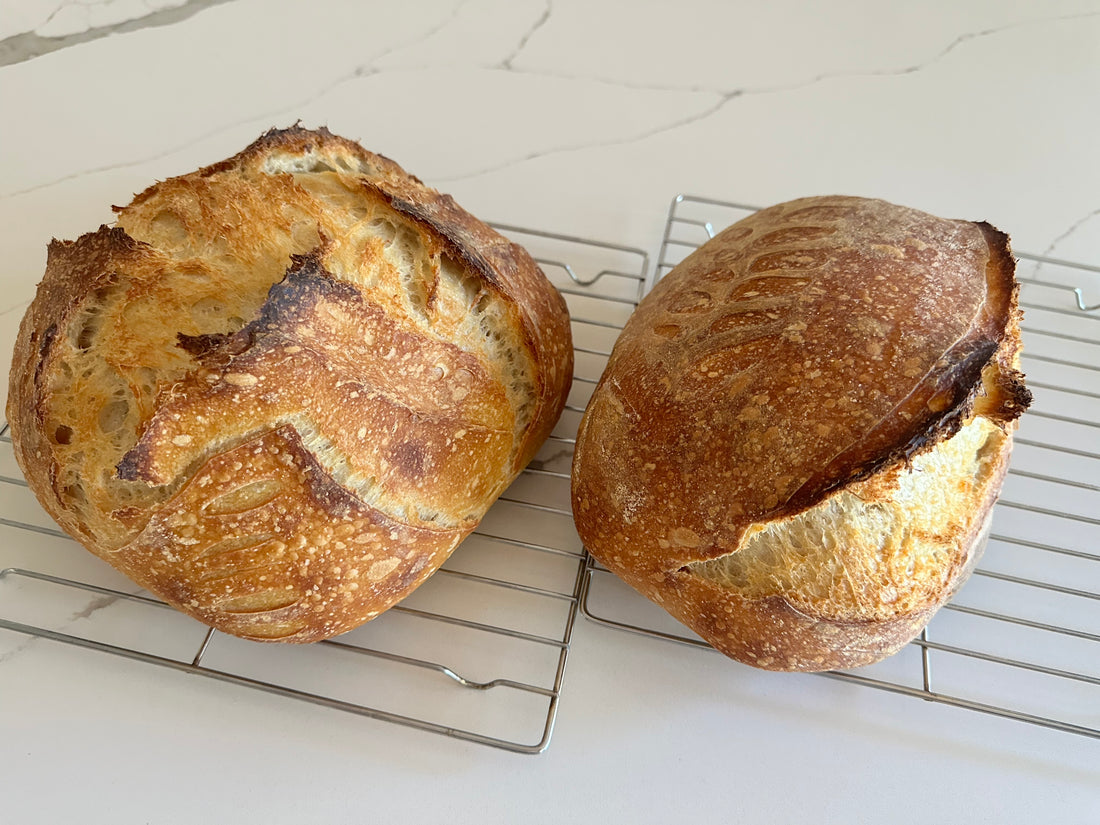
Score the top of your dough: Gently transfer your dough from the banneton basket to a silicone bread sling or parchment paper. Then score with any preferred design. I typically do a cross on my round artisan boules and one long slash on my oval loaves (batards). Artistry isn't my specialty!
Bake: Carefully remove your hot Dutch Oven from the oven. Keep the dough on bread sling or parchment paper and transfer your sourdough to the pot.
Bake covered for 35 minutes.
Remove the lid and bake an additional 5-10 minutes until golden brown.
Cool on a wire rack for at least an hour before cutting your first slice. It’s recommended to wait even longer - preferably wait 4-6 hours. This may be the most difficult part!
Storage: Do not store your bread in the fridge! Fridges are built to pull moisture out of foods, which does preserve things longer, but also makes fresh bread taste stale quicker. Instead, we recommend our reusable bread bags which are perfect for keeping your bread fresh on your counter for a week. Another option is to keep your bread under a cake plate. Ziplock bags hold in too much moisture (think mold!) and other bags or bread boxes allow too much airflow. If you bake multiple loaves like I do, then freezing is a great option to be able to take a loaf out at a later date and still have it be fresh. Again, our reusable bread bags are perfect for this! But you can also freeze in a Ziplock freezer bag.

My Typical Schedule:
Between 6 and 7 am: Feed my Starter. Because I need around 150g of starter for my double recipe, I do a 1:2:2 ratio with 40g starter, 80g flour, and 80g water.
Around Noon to 1:30: My Starter is usually around peak at this time, so I mix together my dough.
For the next 6-8 hours: Bulk fermentation including Stretch-and-Folds. Then I shape and put into banneton baskets.
Overnight: I put the banneton baskets into the fridge overnight for the cold ferment.
Next morning: I tend to bake first thing in the morning, but you can wait any amount of time - even up to 2 days later!
This schedule works great for someone who works Monday through Friday. Essentially you would begin the process Saturday morning and bake on Sunday.
Alternate Schedule:
Right before bedtime: Feed your Starter.
First thing in the morning: The earlier the better for this! Mix your dough.
Early afternoon: Put the banneton baskets into the fridge and bulk ferment for at least 5 hours.
Evening time: Bake! Then the cooled bread will be ready to eat the next morning.
This schedule is great for someone who wants to get the whole process done in a day. For someone new to sourdough bread baking, this may be a more complicated timeframe because you might not be able to read the signs of when the dough is ready to be shaped and cold fermented. But if you only have one day and you are a newbie, don't be afraid to give it a go!
Bringing It All Together
Mastering sourdough bread baking is a journey that requires patience and practice. It's perfectly normal for beginners to encounter challenges along the way, from understanding the intricacies of sourdough starters to perfecting shaping and scoring techniques. Embrace each bake as an opportunity to learn and improve, rather than aiming for perfection from the start. Enjoy the process of experimentation, learning from mistakes, and celebrating small victories along the way.
With time and dedication, you'll develop the skills and intuition needed to consistently produce delicious homemade sourdough bread. So, savor the journey, relish the aroma of freshly baked bread filling your kitchen, and delight in the satisfaction of creating something truly special with your own hands.