
Sourdough Starter Simplified: A Foolproof Guide
Baking sourdough bread is having a moment - and for good reason!
That chewy crust, the perfect tang, and that rustic, homemade feel make sourdough something special. But it’s more than just a delicious loaf; it’s an experience. There’s something almost magical about turning simple ingredients into beautiful, golden-brown bread. And the secret to this magic? A little thing called a sourdough starter. If you’ve ever thought about baking sourdough but felt overwhelmed by the idea of maintaining a living, bubbling mixture, don’t worry—we’re here to simplify everything. Trust us, anyone can do it, and we’ll show you how.

Sourdough isn’t just about taste; it’s also great for your health. Thanks to the long fermentation process, sourdough can be easier to digest for some people. It breaks down gluten and can boost your gut health with all those friendly bacteria. It even has a lower glycemic index than most other breads, meaning it won’t spike your blood sugar as much. So, not only does sourdough look and taste fancy, but it’s also kind of a bread superhero!
So, what’s a sourdough starter, exactly? It’s like a little science experiment that lives in your kitchen—a mix of flour and water that, when left alone for a bit, turns into a bubbling, living thing full of natural yeast and bacteria. This is what makes sourdough so unique—you don’t need store-bought yeast, just what’s already hanging out in the air around you. Your starter is the key to getting that rise and signature tangy flavor. Sounds fancy, but the truth is, starting and keeping one going is way easier than you’d think. If you can stir together some flour and water, you can make sourdough!

Once you have your starter going, keeping it alive is as simple as feeding it regularly—like you would a houseplant (but easier because no sunlight required!). It becomes a fun, almost meditative part of your routine, and before you know it, you’ll be baking bread that rivals your local bakery.
Speaking of patience… that’s the real secret ingredient when it comes to your sourdough starter. This isn’t an overnight project. A good starter takes anywhere from 2 to 4 weeks to fully develop, and you’ve got to give it time to grow, bubble, and strengthen. In the early days, it might feel like nothing’s happening, or like it’s too slow, but trust the process! Every day that you feed it, your starter is getting more active and robust. It’s a slow build, but that’s the beauty of it—it encourages you to slow down and appreciate the gradual progress. And when your starter is finally ready, bubbly and strong, you’ll know it’s been worth the wait.
In this guide, we’ll walk you through everything you need to know to start, maintain, and love your sourdough starter. You’ll learn how to troubleshoot common issues, get some pro tips, and feel totally confident about baking your first loaf. Ready to get started? Let’s do this!
The Science Behind the Bubbles: How Your Sourdough Starter Comes to Life
When you make a sourdough starter, you're essentially creating the perfect environment for wild yeast and beneficial bacteria to thrive. It all starts with a simple mix of flour and water. The natural yeasts and bacteria already present in the flour and in the air begin to feed on the sugars in the flour, breaking them down through a process called fermentation. The wild yeast produces carbon dioxide, which is what gives your bread its rise, while the bacteria (mainly Lactobacillus) produce lactic acid, giving sourdough its signature tangy flavor. Over time, this microbial community grows stronger, creating a bubbling, living culture that’s ready to transform your bread into something truly special. This combination of yeast and bacteria also helps break down gluten, making the dough more digestible. So, in scientific terms, your starter is a mini ecosystem working to make your bread both tasty and healthier!
Choosing the Right Water and Flour for Your Sourdough Starter
The beauty of a sourdough starter lies in its simplicity—just two ingredients: flour and water. But even with these basics, there are a few important details that can make a big difference in the success of your starter. Let’s start with water. Since sourdough is all about cultivating wild yeast and bacteria, it’s important to use water that doesn’t contain chlorine, which can interfere with the fermentation process. If you’re using tap water, you can let it sit out for 24 hours to allow the chlorine to evaporate, or you can use filtered water, like from a Brita filter. Personally, I use filtered water from my fridge and microwave one cup of it for about 30 seconds to bring it to room temperature quickly. You want the water to be lukewarm, not cold, so the fermentation process isn’t slowed down. There’s no need to buy bottled water, but be sure to avoid distilled water since it lacks the minerals that help yeast thrive.

As for the flour, unbleached is the way to go. Bleached flour has been treated with chemicals that can inhibit the natural yeasts and bacteria you want to encourage in your starter. All-purpose unbleached flour is perfect for beginners—it's widely available and works great. However, adding some whole wheat or rye flour to the mix can give your starter a boost. These flours have more nutrients and wild yeasts than refined flour, helping to kick-start fermentation. Personally, I like to use a 50/50 blend of all-purpose and whole wheat flour. The whole wheat provides extra nutrients, while the all-purpose keeps things light and manageable. This combination makes for a strong, active starter that’s perfect for baking delicious sourdough!
Jar, Spatula, Scale: Your Simple Setup for Sourdough Starter Success
Starting and maintaining a sourdough starter doesn’t require much in terms of equipment, but having the right tools can make the process smoother and more enjoyable. First, you’ll need a jar with a lid that allows for a bit of airflow. A completely airtight lid can trap gases and potentially cause issues with your starter, so being able to unscrew it a bit or leave the lid ajar is important. Personally, I prefer a straight-sided jar with a silicone lid that has built-in air channels. This allows the gases from fermentation to escape without exposing your starter to too much air. However, a regular Mason or Weck jar will work perfectly fine. Just make sure the jar is tall enough to accommodate your starter as it grows and bubbles up.
Next, you’ll need something to stir your starter, and I recommend a silicone spatula. Silicone is great because it doesn’t stick as much as wooden spoons or metal utensils, making it easier to mix the flour and water into the starter without too much mess. Another essential tool is a digital kitchen scale that measures in grams. Measuring by weight rather than volume is not only easier but also much more accurate, helping you maintain the right balance in your starter.
Eventually, as your starter grows and you begin discarding portions of it, you’ll want a second, larger jar to collect the discard. If you plan to make discard recipes (like pancakes, crackers, or waffles), having a jar dedicated to your leftover starter can be a handy way to reduce waste and make the most of the fermentation process.
Having these basic tools will set you up for success and make the process of starting and maintaining your sourdough starter a lot easier!
Creating Your Starter: The Simple Recipe to Get You Baking
EQUIPMENT
- Medium to Large sized jar
- Digital Food Scale
- Silicone Spatula
DAILY INGREDIENTS
- 50 Grams Flour - All-Purpose, Wheat, or Rye
- 50 Grams filtered water
DAY 1
Weigh your empty jar in grams and make sure to write down the weight—you’ll need it for reference later.
Add the water and flour to the jar, stirring until all the flour is fully incorporated. The mixture should have a thick, pancake batter-like consistency, especially if you’ve included any whole wheat or rye flour. Once mixed, cover the jar loosely with a lid to allow some airflow.
Now, find a warm spot for your starter to rest, ideally between 70 and 80 degrees F, for the next 24 hours. If your house tends to be on the cooler side, you can place the jar in your oven with the oven light on (but the oven itself off), or you can use a warming mat to keep it at the right temperature.

DAY 2
After 24 hours, it’s time to check in on your starter and give it a good stir. You don’t need to add any new ingredients today—just mix it thoroughly to aerate the mixture, then cover it loosely and let it rest for another 24 hours.
You might start to notice a few bubbles forming, which is a great sign that fermentation is happening! But if nothing has changed yet, don’t worry—it’s completely normal. Patience is key here. Just make sure it stays in a warm spot to encourage that activity.

DAY 3
Start by discarding all but 50 grams of your starter. To the remaining 50 grams, add 50 grams each of flour and water. Stir the mixture well, making sure to incorporate plenty of air. Cover the jar loosely, and set it aside until the next day. This is your daily feeding routine—try to stick to the same time each day for consistency.
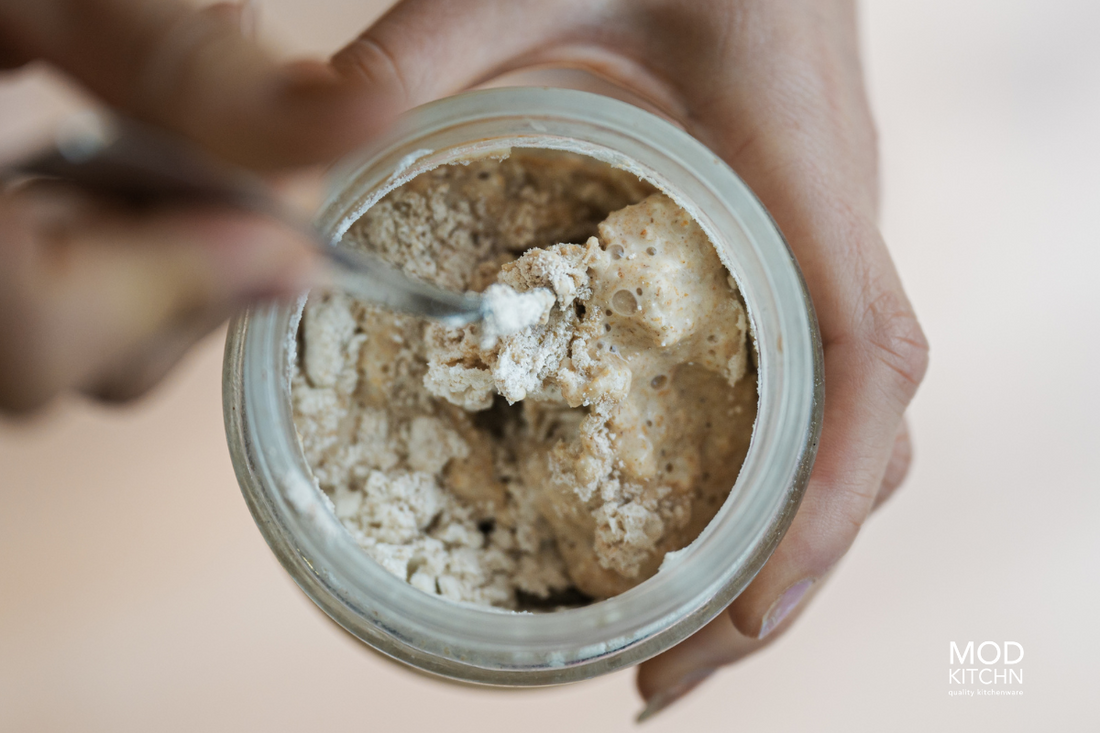
At this stage, you might notice that your starter rises a bit after feeding, a phenomenon known as a "false rise." This rise is usually modest—often less than doubling—and is caused by bad bacteria working through the mixture. It’s important to remember that this is not a sign your starter is ready for baking. In fact, using it now could be harmful, as the starter hasn’t fully developed yet. You might also see a layer of liquid on top, called hooch, which is another normal sign that your starter is hungry. Just stir it back in when you feed it. These are all natural parts of the fermentation process, so keep going!
DAYS 4 THROUGH 7
Continue the same feeding routine each day at the same time. Be sure to keep everything consistent—don’t switch up the type of flour, water, or any other variables.
At this point, it’s common for your starter to seem inactive, like it’s stalled or even "died." Many people get discouraged here and either give up or start over, but don’t! Even if you saw some activity or a false rise before, it might now look like nothing’s happening for a few days. This lack of visible action is completely normal, so stick with the process. Your starter is still developing, even if it seems quiet.
DAYS 8 THROUGH 14
At this stage, you’ll often notice your starter coming back to life. It may start rising again, sometimes even doubling in size gradually. Some starters are faster than others and might begin doubling or even tripling within 2 to 7 hours after a feeding. However, if you’re still not seeing much, or any rise yet, don’t worry—this can be completely normal too. Some people experience a lot of bubbling without much rise during this period, while others may see just a small increase closer to the end of this phase. Every starter has its own pace, so keep feeding it consistently, and it will continue to develop!
DAYS 14 THROUGH 21
Most starters will reach the point of being usable during this time, but if yours is still showing little to no activity, don’t worry—just keep feeding it consistently. Some starters can take a month or even longer to fully mature.
The only factor you might want to double-check is the temperature. Ensure your starter is kept in a warm enough environment, as cooler temperatures can slow down its development. Stay patient, and rest assured that with time and regular feedings, your starter will eventually become active and ready for baking!

My personal experience was that I got a false rise on Day 2 and Day 3...then nothing. Just some bubbles for several days. On Day 12 I got minimal rise within about 12 hours of feeding. Day 13 my sourdough starter doubled in 12 hours. On Day 14 and 15 it doubled in 8 hours. On Day 16 it doubled in 3 1/2 hours and got got so big I had discard some before it overflowed! I made my first loaf on Day 18 or 19.
WHEN IS MY SOURDOUGH STARTER READY TO USE?
Your sourdough starter is ready to use when it consistently doubles in size within 6 to 8 hours of feeding for at least three days in a row. This steady rise indicates that the yeast is active and ready to leaven bread. Additionally, your starter should be at least 10 days old to ensure that any harmful bacteria have been worked out, making it safe for baking. Finally, take note of the smell—it should have a pleasant, slightly tangy aroma, with lots of bubbles showing that the fermentation process is thriving. If your starter meets these conditions, it’s ready to bake!
MAINTAINING YOUR STARTER
To maintain your sourdough starter long-term, you have a couple of options depending on how often you bake. If you’re baking several times a week and enjoy using the discard for other recipes (like pancakes or crackers), you can keep your starter at room temperature and feed it daily. This keeps it active and ready to bake with minimal preparation time.
However, if you’re not baking as frequently, you can store your starter in the refrigerator. The cold temperature slows down the fermentation, meaning you only need to feed it occasionally. When you’re ready to bake, take the starter out of the fridge a day or two beforehand, feed it as usual to reactivate the yeast. This method is low-maintenance and perfect for those who only bake occasionally, but still want to keep their starter healthy and ready for action!
Frequently Asked Questions
1. What do the different ratios mean and why would I use them?
Different ratios of starter, flour, and water are used in sourdough maintenance to control the activity, strength, and hydration of your starter. These ratios are expressed in a “starter:flour:water” format and can be adjusted depending on your baking needs and schedule. Here are a few common ratios and what they’re best for:
1:1:1 Ratio (Equal Parts Starter, Flour, Water)
This is the most common feeding ratio for maintaining a healthy starter. It means using equal amounts (by weight) of starter, flour, and water. For example, if you keep 50 grams of starter, you would feed it 50 grams of flour and 50 grams of water. This ratio is ideal for regular daily maintenance when your starter is kept at room temperature, as it keeps your starter active and ready for baking.
1:2:2 Ratio (One Part Starter, Two Parts Flour, Two Parts Water)
This ratio is used to slow down the activity of your starter while still feeding it enough to keep it healthy. For example, if you have 50 grams of starter, you would feed it 100 grams of flour and 100 grams of water. This larger feeding reduces the starter's acidity and gives it more food to ferment, making it last longer between feedings. It’s useful if you’re storing your starter in the fridge and don’t plan to bake often.
1:3:3 (or Higher) Ratio (One Part Starter, Three Parts Flour, Three Parts Water)
This ratio is great for building strength in your starter. If your starter seems sluggish or inactive, feeding with a 1:3:3 ratio gives it more flour and water to ferment, which can help boost its activity. For example, 50 grams of starter would be fed with 150 grams of flour and 150 grams of water. This ratio can also be used when you need to bulk up your starter quickly for a large baking project.
By adjusting these ratios, you can manage your starter’s activity and hydration levels depending on how often you bake and the type of bread you’re making.
2. What's the best process for refrigerating my sourdough Starter?
The best process for refrigerating your sourdough starter starts with feeding it right before placing it in the fridge. After you discard and feed it using the 1:1:1 ratio (equal parts starter, flour, and water), make sure the starter is stored in an airtight jar. This helps prevent it from drying out and keeps unwanted bacteria from getting in.
If you plan to keep your starter in the fridge long-term, it’s important to take it out and feed it once in a while to keep it healthy and active - we recommend once per week. Simply let it come to room temperature, discard and feed it as usual, then you can either bake with it or return it to the fridge. Regular feedings will ensure your starter stays strong and ready to use whenever you’re ready to bake!
3. Why would I need to feed my Starter twice per day?
Some people feed their sourdough starter twice per day to keep it highly active and ready for baking, especially if they bake frequently or want to maintain a very strong starter. Feeding twice a day ensures that the yeast and bacteria in the starter are constantly well-fed and never run out of food. This frequent feeding prevents the starter from becoming too acidic, which can happen if it sits too long between feedings, and keeps it in an ideal state for producing a good rise in bread.
However, feeding your starter twice a day or more does have some downsides. For one, it generates more discard, meaning you’ll have to find ways to use or dispose of the extra starter. Additionally, it can be more time-consuming to maintain a twice-daily feeding schedule, which may not be practical for everyone. Feeding more often also means using more flour, so if you’re not baking frequently, it can feel like wasted resources. In general, while twice-daily feeding is great for frequent bakers or professionals, it might not be necessary for casual bakers who don’t need their starter to be on standby all the time.
4. How do I make more Starter if I need it for my baking?
If you need more sourdough starter for baking, it’s easy to increase the amount you have by feeding it larger quantities of flour and water. Here’s how you can do it:
-
Feed with a Higher Ratio: Instead of using the usual 1:1:1 ratio, you can feed your starter using a 1:2:2 or even 1:3:3 ratio. For example, if you have 50 grams of starter, add 100 grams of flour and 100 grams of water (for 1:2:2) or 150 grams of flour and 150 grams of water (for 1:3:3). This will significantly increase the volume of your starter.
-
Multiple Feedings: If you need even more starter, you can feed it twice in one day. Feed it once in the morning and once in the evening, using the same method, and you’ll quickly build up the quantity.
-
Repeat Daily Feedings: Continue feeding your starter larger amounts for a few days before you plan to bake, and it will grow quickly. Just make sure your jar is big enough to accommodate the increased volume!
By feeding your starter larger amounts and/or more frequently, you can easily scale up the amount of starter to match the needs of your baking project.
5. My sourdough starter smells funny, like acid or acetone. How do I fix that?
If your sourdough starter smells like acid or acetone (nail polish remover), it’s a sign that it’s hungry and needs to be fed more frequently. This smell comes from the buildup of acids, which happens when the yeast and bacteria in your starter have consumed most of the available nutrients. Here’s how to fix it:
-
Feed it more frequently: If you’re feeding it once a day, try increasing to twice a day for a while, especially if it’s kept at room temperature. This gives your starter more food and helps balance out the acids.
-
Use a higher feed ratio: Instead of the typical 1:1:1 ratio, try feeding with a higher ratio, like 1:2:2 or 1:3:3 (one part starter to two or three parts flour and water). This dilutes the acidity and provides more food for the yeast and bacteria.
-
Refresh the starter: If the smell is strong, you can discard most of the starter, leaving just a small portion (around 20-30 grams), and then feed it with fresh flour and water in a higher ratio. This refreshes your starter and helps balance the microbial activity.
By feeding it more frequently and in larger ratios, your starter should lose that acetone smell and become healthy and balanced again.
6. What should I do if there is liquid (hooch) on top of my Starter?

If there’s liquid, known as hooch, on top of your sourdough starter, don’t worry—it’s a normal sign that your starter is hungry. Hooch forms when the yeast in your starter runs out of food, and it’s often accompanied by a strong, sour smell. Here’s what you can do:
-
Stir it back in or pour it off: You can either stir the hooch back into your starter or pour it off if you prefer a less sour flavor. Stirring it back in will add to the tanginess of your starter, while pouring it off may reduce that acidity a bit.
-
Feed your starter: After dealing with the hooch, give your starter a good feeding using the usual 1:1:1 ratio or a higher ratio (1:2:2 or 1:3:3) to give it more fresh flour and water. This will help get your starter back into balance and active again.
-
Increase feeding frequency: If you’re seeing hooch regularly, it’s a sign that your starter needs to be fed more often. Consider increasing your feeding schedule, especially if your starter is kept at room temperature.
By stirring or pouring off the hooch and giving your starter a good feeding, you’ll keep it healthy and thriving!
7. How do I know if I killed my sourdough Starter?
It can be hard to tell if your sourdough starter is truly dead, but there are a few signs that can help you determine if it’s beyond saving or just needs some extra care:
-
No Activity at All: If your starter isn’t showing any signs of life—like bubbling, rising, or any fermentation activity—after several days of regular feedings, it might be dead. Even a sluggish starter will usually show some bubbles or rise a little within a day or two of feeding.
-
Strong Off Odor: A healthy starter should have a pleasantly tangy or yeasty smell. If your starter has an overwhelmingly bad smell, like rotten, moldy, or putrid odors (different from sour or acetone-like smells), it could indicate that harmful bacteria have taken over.
-
Visible Mold: If you see mold growing on the surface of your starter or inside the jar, it’s a sign that your starter is contaminated and should be discarded. Mold is a clear indicator that your starter is no longer safe to use.

-
Texture Issues: If your starter becomes completely watery, separates permanently, or forms a crusty, hard layer, it may be too far gone. While some separation or hooch is normal, an extreme change in texture can mean the starter is struggling.
How to Revive It:
Even if your starter seems lifeless, there’s a chance you can revive it! Discard most of the starter, leaving just a small amount (around 20-30 grams), and feed it with fresh flour and water using a higher feed ratio (1:2:2 or 1:3:3). Try feeding it twice a day and keeping it in a warm spot to boost activity. If after several days there’s still no sign of life, it may be time to start fresh.
Important Note for New Starters:
If your starter is brand new, it’s important to remember that it can take time—sometimes weeks—to become fully active. New starters often go through phases of inactivity or slow development, so patience is key. Give it regular feedings and plenty of time before deciding it’s not working.
In short, as long as there’s no mold, extreme off odors, or complete inactivity, there’s hope for revival!
8. How long is discard good for? And how do I store it?
Sourdough discard is typically good for up to a week if stored properly in the refrigerator. Over time, the discard will continue to ferment, so the longer it sits, the more tangy and acidic it will become, which can affect the flavor of recipes you use it in. While discard that’s older than a week may not spoil immediately, it could develop off flavors that may not be desirable for certain recipes.
How to Store It:
-
Refrigeration: To store discard, simply place it in a clean, airtight container and keep it in the refrigerator. Each time you feed your starter and collect discard, you can add it to the same container. Just give it a quick stir to mix it all together.
-
Freezing: If you don’t plan on using the discard within a week, you can freeze it for longer-term storage. Portion it into small amounts, freeze it in an airtight container or freezer-safe bag, and thaw it when you’re ready to use.
Whether you refrigerate or freeze it, sourdough discard can be a great ingredient for recipes like pancakes, crackers, and waffles. Just remember to keep track of its age for the best flavor results!
9. What's the best way to dispose of sourdough Starter? Is it safe to put down my sink drain?
The best way to dispose of sourdough starter is to either compost it or throw it in the trash. While it might be tempting to wash it down the sink, it's not a good idea to pour sourdough starter down the drain. Starter is thick, sticky, and can harden over time, which increases the risk of clogging your pipes.
Safe Disposal Options:
-
Composting: Sourdough starter is a natural, organic material and can be composted along with other food scraps. Just be sure to mix it in well with other compost materials to help it break down faster.
-
Trash: If composting isn’t an option, the simplest solution is to throw the starter in the trash. You can scrape it into a paper towel or directly into your trash bin.
By avoiding the sink, you’ll protect your plumbing and safely dispose of your extra sourdough starter!
10. Do I need to change Starter jars?
You don’t need to change your sourdough starter jar every day, but it’s a good practice to switch jars once or twice per week to keep things clean and fresh. Over time, residue can build up on the sides of the jar, which might affect the cleanliness and overall health of your starter.
Here’s what you should keep in mind:
- Regular Maintenance: Wiping down the inside of the jar between feedings can help reduce buildup. If you notice crusty bits of dried starter or see a lot of residue forming, that’s a sign it’s time to swap out the jar.
- Changing Jars: Once or twice a week, transfer your starter into a clean jar. Just scoop out your active starter and place it into the fresh container. Be sure to use a jar that allows some airflow or cover it loosely for proper fermentation.
Regularly changing jars helps prevent contamination and keeps your starter in great condition!
11. How do I preserve some Starter in case mine goes bad?
To preserve some of your sourdough starter as a backup in case your main batch goes bad, you can either dry it or freeze it. Both methods allow you to store your starter long-term and revive it when needed. Here’s how to do it:
1. Freezing Your Starter:
- Feed your starter as usual and let it become active.
- Once it’s bubbly and well-fed, take a portion of it (about 1/4 cup) and place it in an airtight container or a freezer-safe bag.
- Label it with the date and freeze it. Frozen starter can be kept for several months.
- To revive: Thaw it in the fridge or at room temperature, then feed it a couple of times to bring it back to life.
2. Drying Your Starter:
- Spread a thin layer of your well-fed starter onto a piece of parchment paper or a silicone mat.
- Let it dry completely at room temperature, which can take 1-2 days depending on the humidity.
- Once dry, break it into flakes and store them in an airtight container or a resealable bag.
- To revive: Rehydrate the dried flakes by mixing them with equal parts water and flour, then feed it regularly until it becomes active again.

Both methods provide a reliable way to preserve your starter and ensure you always have a backup ready in case your active one goes bad.
12. Why is ambient temperature so important to sourdough Starter?
Ambient temperature plays a crucial role in the health and activity of your sourdough starter because it directly affects the fermentation process. The wild yeast and bacteria in your starter thrive in a specific temperature range, which impacts how quickly they break down the flour and produce carbon dioxide (which makes the bread rise) and lactic acid (which gives the sour flavor). Here’s why it matters:
-
Optimal Temperature Range: Sourdough starters do best in temperatures between 70°F and 80°F (21°C to 27°C). At this range, the yeast and bacteria are active and balanced, creating a healthy fermentation process that leads to a bubbly, well-risen starter.
-
Cooler Temperatures: If the temperature drops below 70°F, the fermentation process slows down. Your starter may take longer to rise, and you might notice less bubbling and activity. In colder environments, the yeast becomes less active, and it may take more time for your starter to reach peak readiness.
-
Warmer Temperatures: In temperatures above 80°F, fermentation speeds up significantly. While this might seem like a good thing, it can lead to an overly acidic starter and an imbalance between the yeast and bacteria. This can result in a very sour starter, or even cause the yeast to be overwhelmed, reducing its effectiveness in leavening bread.
Maintaining a consistent, moderate temperature is key to ensuring your starter stays active, healthy, and balanced. If your home is too cool or too warm, you may need to adjust feeding times or find a better spot for your starter to thrive.
13. What are some tips for keeping my Starter at the correct ambient temperature?
Maintaining the correct ambient temperature (between 70°F and 80°F) is crucial for keeping your sourdough starter healthy and active. If the temperature is too cold, fermentation will slow down, and if it’s too hot, your starter may become overly acidic or ferment too quickly. Here are some tips to both warm up and cool down your starter, ensuring it stays in the optimal range.
How to Warm Up Your Starter:
-
Use the Oven with the Light On: If your home is cooler than the ideal range, place your starter in the oven with the light on (oven off). The light provides just enough warmth to keep the temperature around 75°F.
-
Warming Mat or Heat Pad: A seedling heat mat or low setting on a heating pad can provide gentle, consistent warmth to keep your starter active.
-
Find a Warm Spot in the Kitchen: Try placing your jar near the back of the stove, on top of the refrigerator, or in a cupboard near appliances that emit heat. These areas tend to be slightly warmer.
-
Insulate the Jar: Wrapping your starter jar in a towel or blanket helps retain warmth in cooler environments.
-
Warm Room: If possible, place the starter in a naturally warmer room, like a laundry room or bathroom.
-
Use a Proofing Box or Cooler: A proofing box or placing your jar in a cooler with a warm water bottle can help maintain a stable temperature without getting too hot.
How to Cool Down Your Starter:
-
Move to a Cooler Spot: If the temperature is too warm, place your starter in a cooler part of the house, like a basement or pantry, where temperatures are naturally lower.
-
Use a Cooler or Insulated Bag: You can place your jar in an insulated cooler or bag to protect it from heat. If needed, add a small ice pack (sealed and not in direct contact) to slightly cool the environment.
-
Partial Refrigeration: If your home is consistently too warm, you can refrigerate the starter for part of the day (4–6 hours) to slow fermentation. Just remember to bring it back to room temperature before feeding.
-
Shaded Area: Keep the starter out of direct sunlight by moving it to a shaded part of the kitchen or house to prevent it from overheating.
-
Fan or Air Conditioner: A small fan or placing the starter in an air-conditioned room can help lower the temperature.
-
Cold Water Bath: If your starter becomes too warm, place the jar in a shallow bowl of cool (not cold) water to gently reduce its temperature.
By using these strategies to both warm and cool your starter as needed, you can maintain the right environment for a healthy, active starter. This balance ensures optimal fermentation, producing a bubbly, vibrant sourdough starter ready for baking!

Keeping a sourdough starter is like having a low-maintenance kitchen pet—it just needs a little care and attention to thrive! With some patience and consistency, you'll get the hang of it. Understanding things like temperature, feeding ratios, and what to look for will help you grow a strong, happy starter that can last for years. Whether you're feeding it daily to keep it active or storing it in the fridge for those occasional bakes, your starter reflects the love you put into it. Sure, you might hit a few bumps along the way—like weird smells or slow rises—but that’s all part of the fun. With time, you’ll have a bubbly, thriving starter ready to help you whip up delicious homemade sourdough bread whenever the craving hits!